The plan is simple
I might do a new version with my current hda at some point..
..maybe
So Unreal Engine came out with a strand based hair system in beta and I thought I’d check it out only to discover I don’t have any premade characters with strand hair - it’s all hair cards!
There are a few addons for Blender that will convert hair cards to curves but they either require more manual work than I believe they should, or are too restrictive. Also, the Unreal spec requires certain attributes to be present on the curves themselves which I’m not sure I could easily do in Blender (give me EverythingNodes please). So this looks like a great opportunity to get my toes wet(-ter) with Houdini.
The plan is simple: Use what is always there, the UVs, to reconstruct a curve per card. Nothing fancy, no need to be super-precise here, no need for expensive point sampling, take the card in UV space, find the midline, reproject.
The work
First things first, validate the input for UVs, transfer them to points and enumerate the cards.
vex
!hasvertexattrib(0, "uv") && !haspointattrib(0, "uv")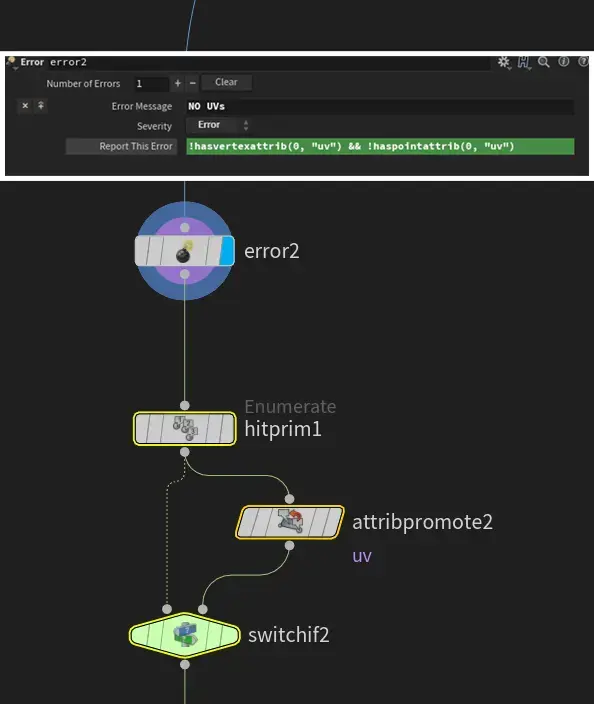
Next generate the curve. Now if the UVs were perfect rectangles (or close enough) just getting the mid of the bounding box would suffice but that’s not always the case - UVs can be pinched, rotated.. So just to be a little more precise we can sample more midpoints along the y using xyzdist. Still won’t be super accurate but it doesn’t really need to.
vex
vector min, max;
getbbox(1, min, max);

int getPoint(float y; vector mn; vector mx;) {
    float closest = xyzdist(1, set(mn.x, y, 0));
    float farthest = xyzdist(1, set(mx.x, y, 0));

    return addpoint(0, set((mn.x + closest + mx.x - farthest) * 0.5, y, 0));
}

int pts[];
int ptCount = chi("pointscount") - 1;
for (int i = 0; i <= ptCount; i++) {
    pts[i] = getPoint(
        (max.y - min.y) * i/ ptCount + min.y,
        min, max);
}
int newprim = addprim(0, "polyline", pts);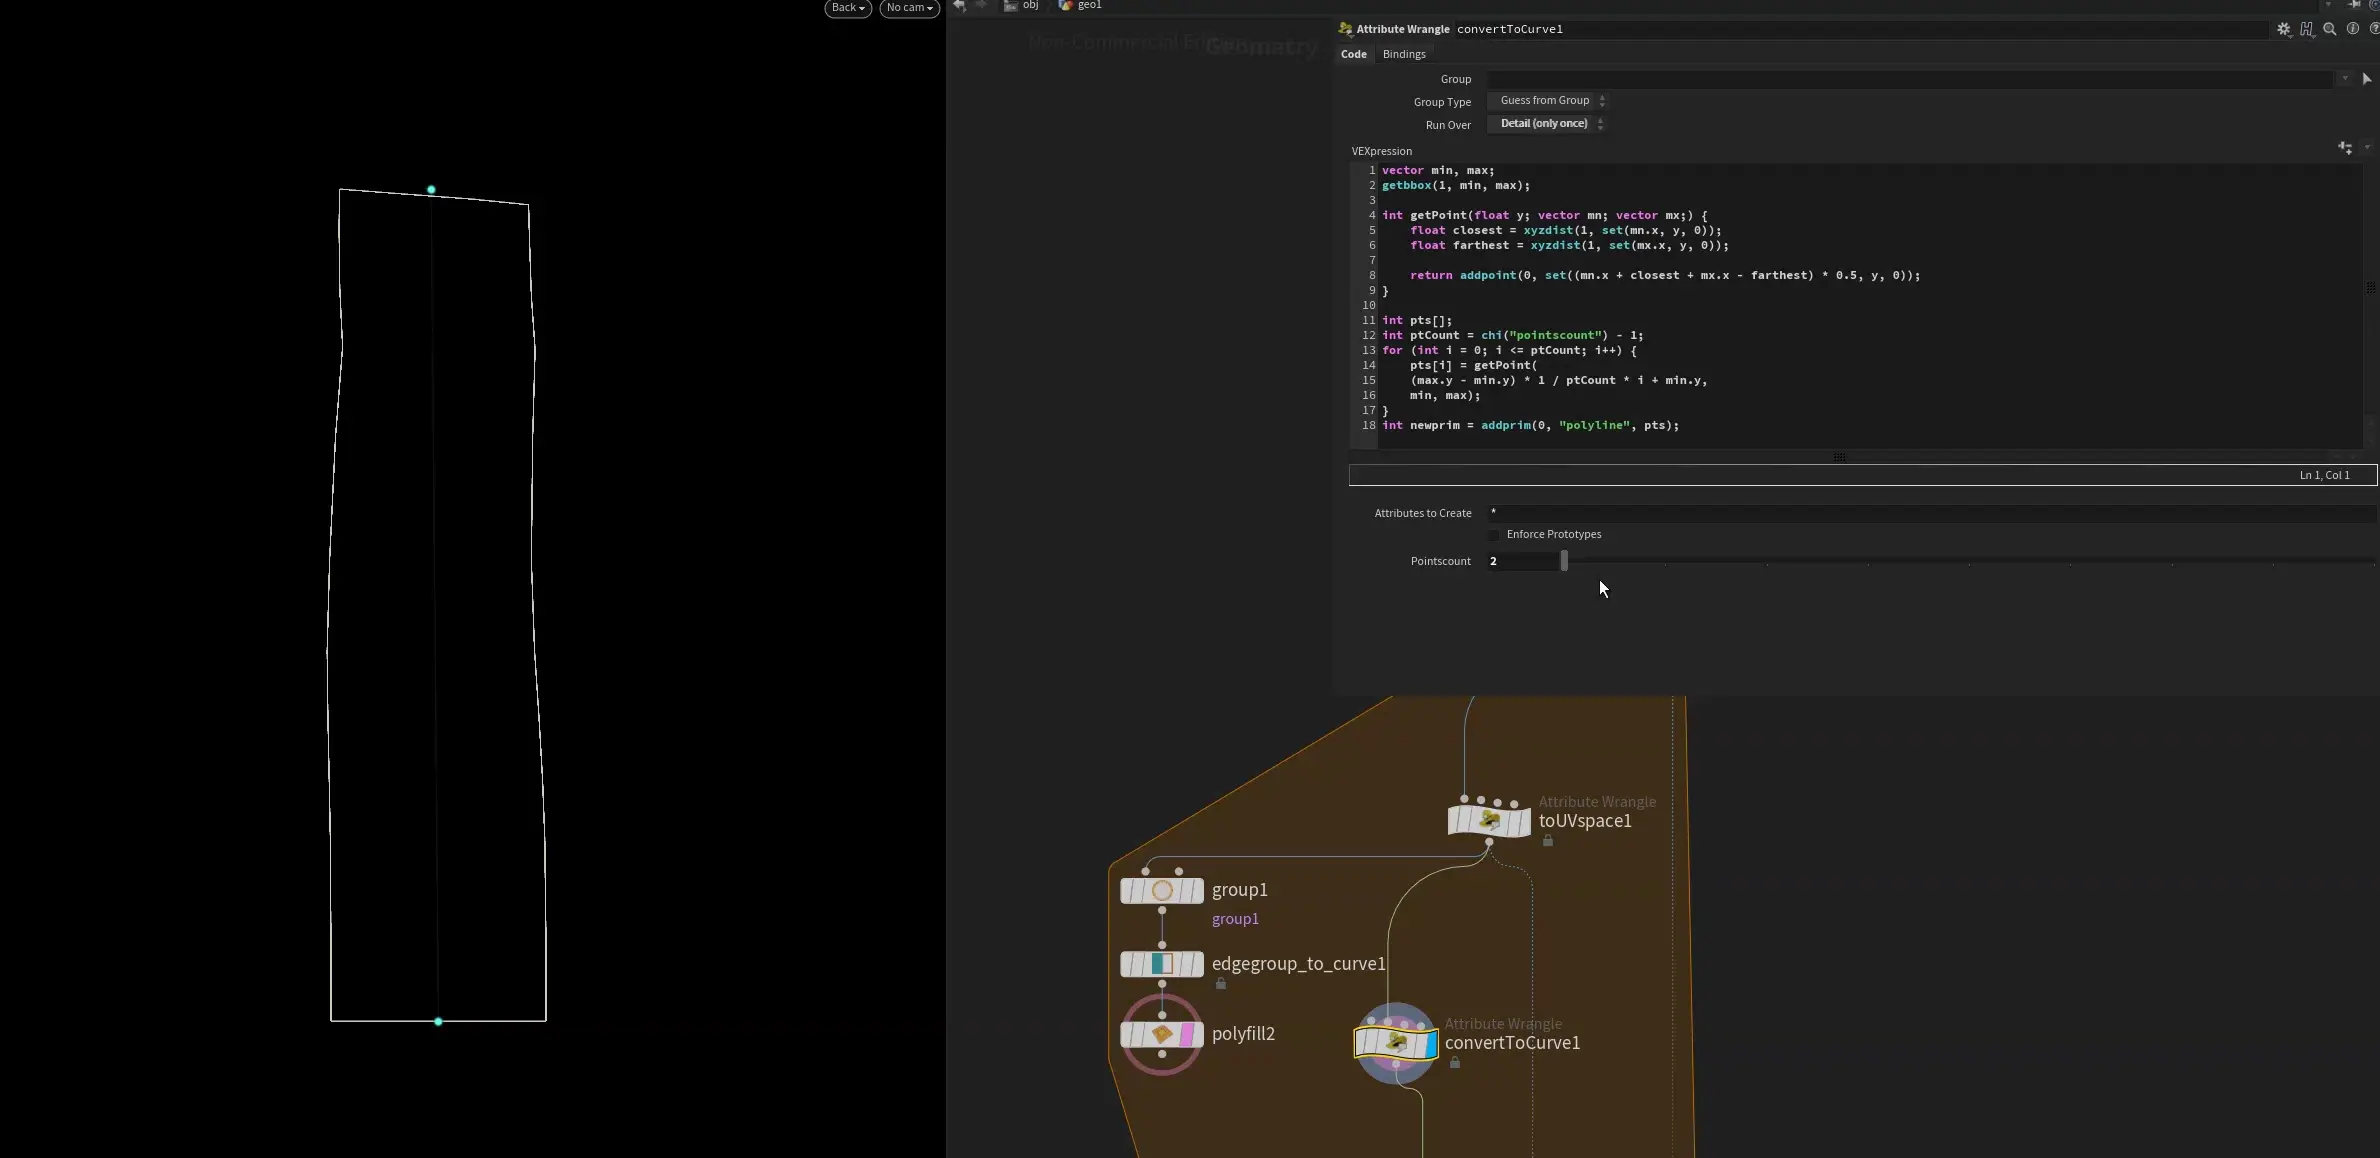
And that’s it for the curves, we could stop here, but we can also make it a little fancier. We could:
- Clean up intersections with the head mesh
- Snap the roots back to the head and make the transition part smoother
- Add a guide skin attribute lookup to get them ready for HairGen in Houdini
To remove point intersections we’ll just check against the head VDB using Attribute from Volume and then blast the points.
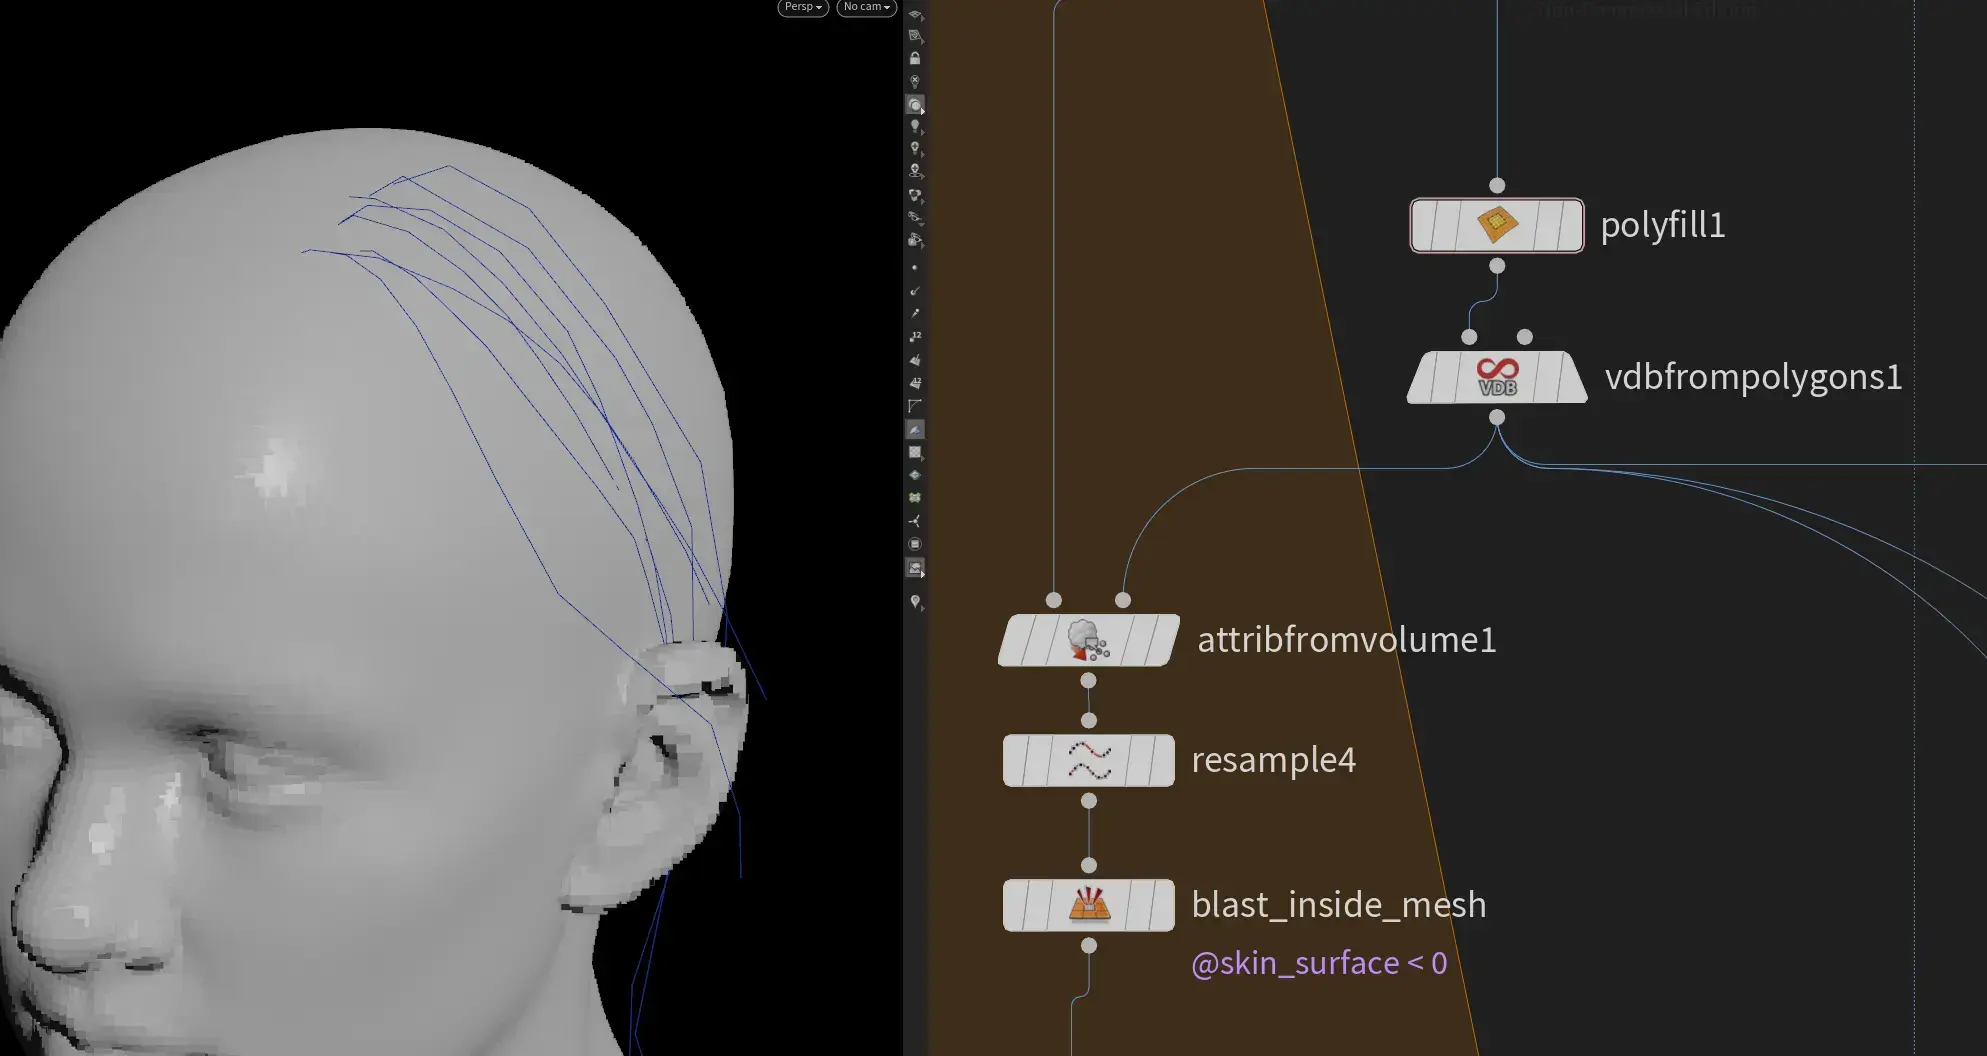
Next, ray the points back. To then make the transition smoother we’ll reconstruct a small part of the curve near the root.
vex
vector dir = normalize(point(1, 'P', 1) - point(1, 'P', 2));

vector p0 = point(1, 'P', 1);
vector p2 = point(1, 'P', 0);

float dist = length(p0 - p2);
vector p1 = p0 + dir * dist * chf("mult");

int step = chi("step");
for (int i = 1; i < step; i++) {
    float t = fit(i, 0, step, 0, 1);
    vector newp = pow((1-t), 2) * p0 + 2 * t * (1 - t) * p1 + pow(t, 2) * p2;
    addpoint(0, newp);
}
Add an attribute lookup, clean up attributes, add compile blocks to taste and create our HDA.
Final HDA
Download .hdanc
Inputs:
- Hair Cards
- (Optional) Head Mesh
- (Optional) VDB Mesh
The head mesh will also be used to identify intersecting points. Adjust the VDB resolution via the Head Voxel Size parameter. Alternatively you may provide your own VDB in the third input and it will skip generating one from the Head Mesh.
Outputs:
- Hair Curves
- Head Mesh
- Head VDB
Parameters:
| Name | Type | Description |
|---|---|---|
| Resolution | int | Amount of points to sample along card |
| Flip UV | bool | A toggle to flip UVs if necessary |
| Attach to Head | bool | Whether to attach the guides to a head mesh |
| Head Voxel Size | float | Resolution for head VDB |
| Resample Length | float | Curve resolution |
| Root Smoothing Strength | float | Amount of root smoothing |
| Root Smoothing Steps | int | Amount of points to use for root smoothing (0 == off) |